Positioning Your 4K Construction Camera for Success
Using construction cameras to help document, manage, and market construction projects of all shapes and sizes is an increasingly common practice.
Due to the number of benefits construction cameras provide to projects both big and small, it’s no surprise that architects, engineers, builders, and other construction pros are putting them to use on both short and long-term projects.
With the increasing popularity of construction cameras, we feel it timely to share some insider tips from the camera experts here at iBEAM to help you and your team get the best results from your construction camera solutions.
Sara’s Tip: Consider the ENTIRE project, start to finish
“It’s something we see from time-to-time — a beautiful project taking shape only to have a telephone pole or utility line placed right in the field of view of the construction camera. It’s not the end of the world, but it certainly can detract from the overall camera experience.”
Instead of rushing to get a camera installed on a project as quickly as possible, take some extra time with your team to review the plans for your upcoming project and strategize where you want to place the camera to maximize the value it’s able to deliver.
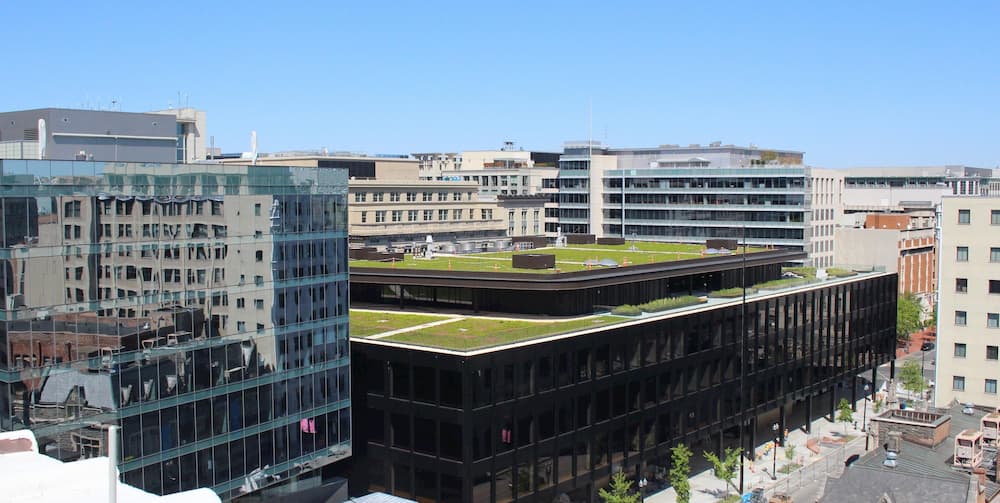
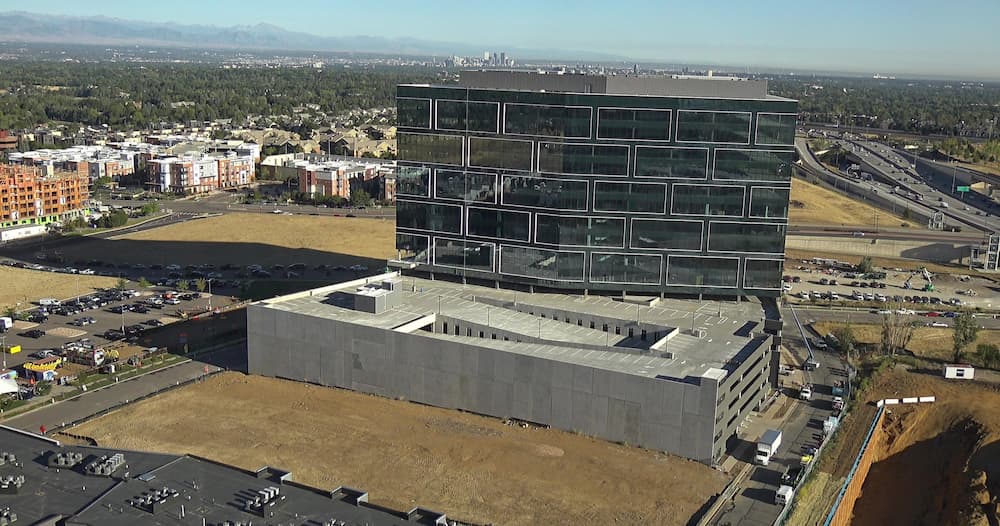
Take advantage of the specific features delivered by your particular camera to maximize the value it brings to your project(s). For example, if your camera offers a super-wide-angle lens, make the most of it, and capture as much of your project as you can. Alternatively, if your camera utilizes PTZ features, take advantage of this feature and utilize multiple presets to automatically capture various angles of your project!
Another important aspect to keep in mind is the direction your construction camera will face. Will sunsets or sunrises negatively impact captured images and time-lapse movies? Are there trees or shrubbery that may creep into images during storms? What will the site look like as the seasons change?
If you’re not entirely sure where to place your iBEAM camera to maximize its value, reach out to our team and we’ll be happy to recommend a location or two based upon your project plans and specific camera solution.
Debbie’s Tip: Use multiple cameras or a PTZ camera to capture ALL angles of your project
If you want to document a large project or a project that has interior and exterior work happening simultaneously, consider using multiple cameras to capture every angle and detail from the job site. Taking advantage of multiple cameras allows for more dynamic footage to be captured of your project.
Instead of seeing just a single view of your project, multiple cameras give you and your team the ability to document multiple areas of interest on the job site. Using multiple cameras also gives you a gold mine of marketable assets to showcase the work you and your teams deliver to projects.
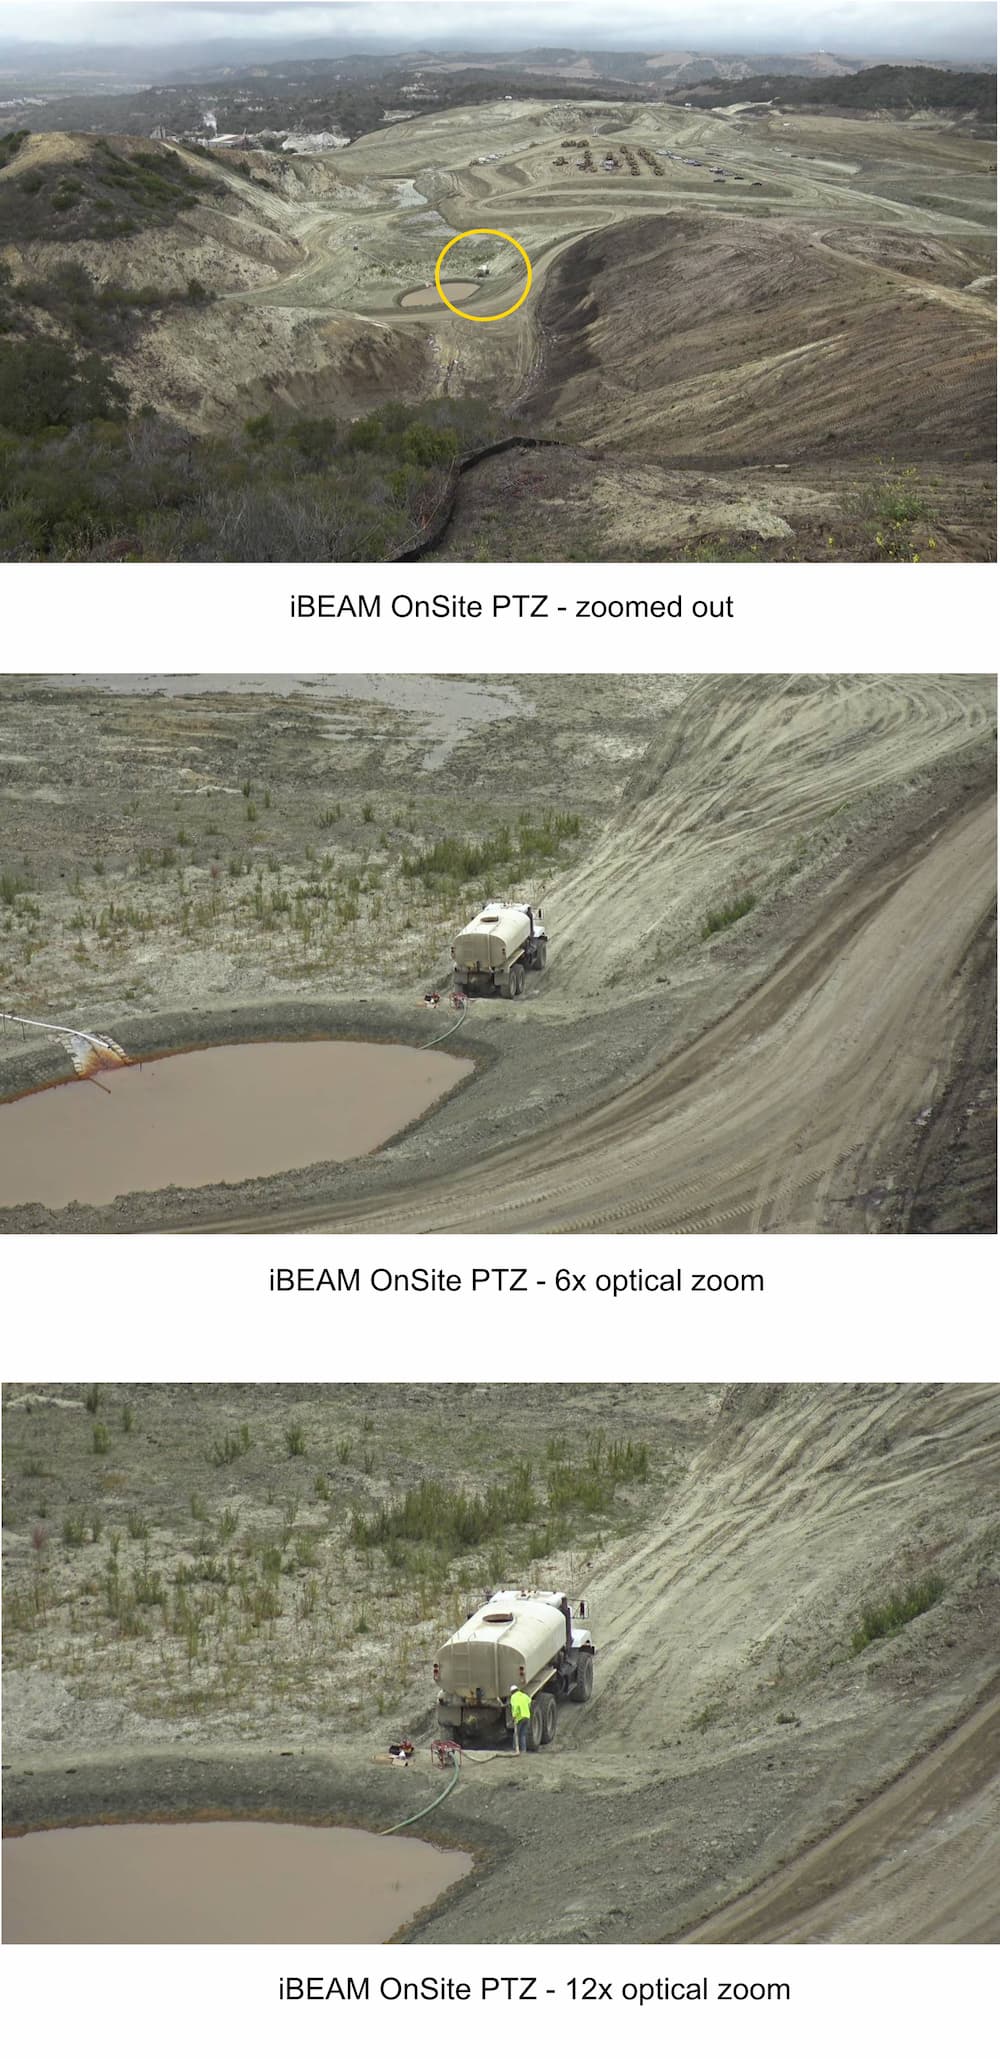
Or consider using a construction camera with user-controlled PTZ (pan-tilt-zoom) for projects of significant size. PTZ-capable cameras allow users to move the camera and zoom in on exactly what needs to be looked at with even more scrutiny and detail. iBEAM PTZ 4K cameras can also autmatically capture photos from multiple preset angles, helping to document various areas of interest simultaneously.
Essentially, a PTZ camera with multiple presets is the equivalent of having multiple cameras on a project.
Erica’s Tip: Look at your camera's view sooner rather than later, and adjust it if needed
After taking the time and effort to find a camera solution and getting it installed on your project, it can be frustrating to discover later on that your camera is off-kilter or not focused on what you really want to document at your job site!
Don't just assume that your camera is focused on what needs to be documented; take a few moments once it’s live on the job site to ensure that it’s level, pointed at your project, and capturing in-focus images and time-lapse videos.
Make sure to periodically check your camera to confirm that the view hasn’t changed and that you are still capturing photos of what you intended. (See the bonus tip below.)
If you need help getting your project in focus or adjusting your iBEAM Construction Camera, our support team is great at doing just that!
BONUS Tip: Mount the camera securely
A sturdy mounting surface and properly tightened mounting hardware ensure that your captured images and time-lapse movies are rock-solid.
Trees and cranes will vibrate and sway in strong winds, so they’re not ideal surfaces for mounting a camera. Instead, consider mounting your camera on a utility pole or an adjacent building (our non-penetrating roof mounts are perfect for this). Once the camera is pointed where you want it, be sure to tighten down the mounting hardware securely.
Taking a little extra time at the beginning of your project to make sure your camera is mounted securely will pay off in spades down the road with crisp 4K photos and captivating time-lapse movies.
Have questions about using a construction camera on your next project?
If you or your team ever have questions about where to mount your iBEAM Construction Camera on a project, or if you’re new to our solutions and have questions about our services, our team of camera specialists is always here to help.
Until next time, keep what’s really important in focus.
Doing the right thing, for every client, every time.
Vicki Robertson
Vice President